
$94.90
Free delivery · 7–14 days
Drone Controller Tablet Mount with Aluminium Holder
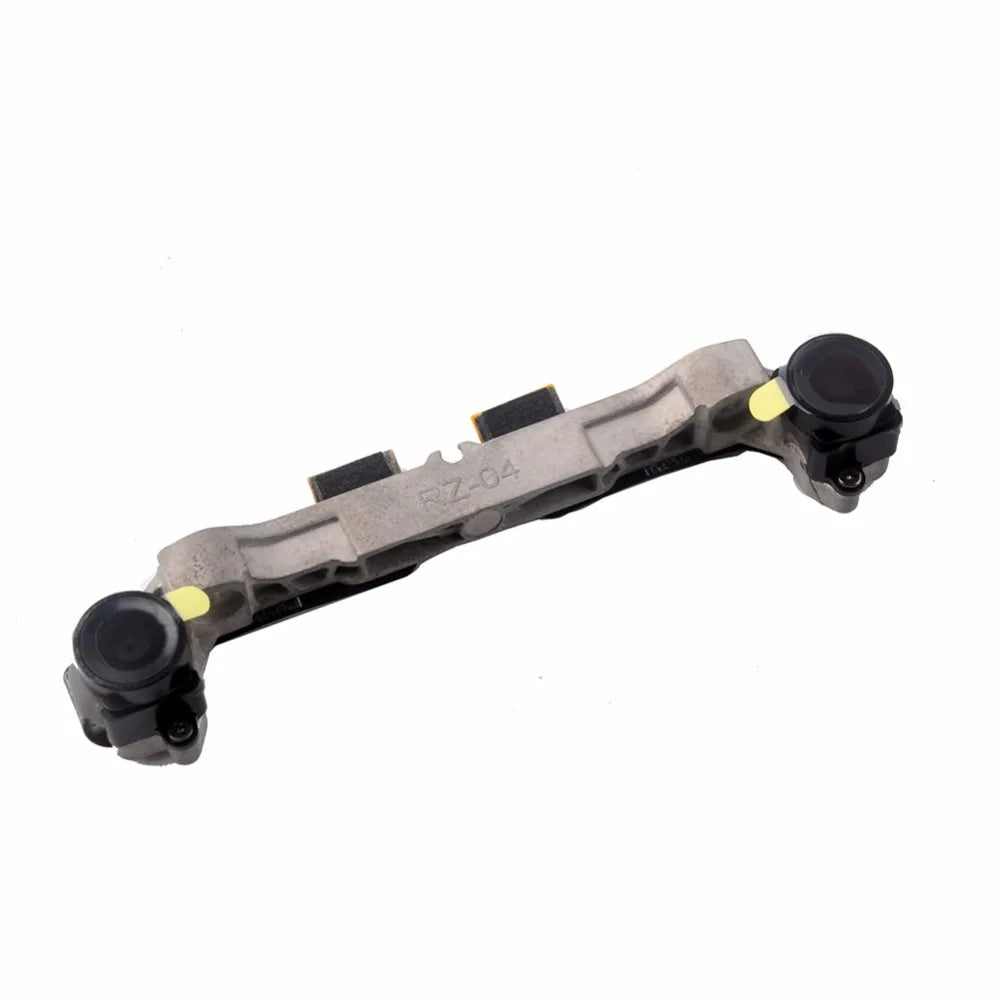


A cracked nose does not have to ground your Mavic Pro. This original DJI front vision sensor brings back forward obstacle avoidance, with twin lenses on a machined aluminum bracket and two flex connectors laid out like the factory part. Check the RZ-04 marking, swap it at your bench, and get back in the air...
Read the full descriptionA cracked nose does not have to ground your Mavic Pro. This original DJI front vision sensor brings back forward obstacle avoidance, with twin lenses on a machined aluminum bracket and two flex connectors laid out like the factory part. Check the RZ-04 marking, swap it at your bench, and get back in the air with detection working.
Original front sensor that restores forward visual obstacle avoidance on DJI Mavic Pro
After a nose crash, the front sensor is the first thing lost. This original DJI module restores forward visual obstacle avoidance so you can fly your Mavic Pro with confidence again.
The two front vision lenses are the sensing pair behind forward visual obstacle avoidance on the Mavic Pro. Both modules sit in matte black housings, so the pair reads as one unit when you check it against the removed part.
The brushed grey aluminum bracket holds the sensor in its original position on the nose. Compare the mounting points and cable routing with the part you removed. A bracket that sits even a few millimetres off will show up as a misaligned lens.
Two flex cable connectors plug into the drone, matching the layout of the factory assembly. The flex cables are the most delicate part of the job, so seat each one straight and gently until it sits flush.
Switch off the drone and remove the battery. Take off the damaged nose section so the front sensor is exposed.
Lift each locking tab, then ease the flex cables out. Do not pull on the ribbon itself.
Lift the old sensor from its bracket and seat the original in the same position. Match the RZ-04 marking and the connector layout against the part you removed.
Seat both flex cables straight until they sit flush, then lock the tabs. Power up and confirm the front sensor status in the app.
Hover in an open area and check that the front warnings respond before you fly any longer route.
Twin lens modules on a brushed aluminum bracket
Attached to the assembly, one per lens side
For securing the cables during install
One hard landing on a branch and the front warning stops responding. The Mavic Pro keeps flying, which is the problem. Without forward detection, every flight means trusting your eyes alone near trees, walls and people.

This is the genuine DJI front vision module. The two lens modules sit on a machined aluminum bracket, and the two flex connectors land where the factory part puts them. You are swapping a like-for-like component, not improvising a fit.

Once the sensor is seated and the app reports front detection, the Mavic Pro is back to forward obstacle avoidance. The drone is ready for the next flight, and the repair cost stayed far below the price of a new airframe.
The sensor is seated, both flex cables are reconnected, and the drone powers up without sensor errors. Confirm the front detection status in the app before flying.
Run short hover tests in an open area and check that the front obstacle warnings respond. Repeat the checks before longer flights.
Keep up regular pre-flight checks on the nose and connectors. Inspect the cables after each flight and recalibrate if the app asks you to.
| Original DJI front sensor | Unbranded sensor module | |
|---|---|---|
| Genuine DJI part | Yes | No |
| Matched flex connector layout | Yes | Partial |
| RZ-04 part marking | Yes | No |
| Machined aluminum bracket | Yes | Partial |
| Cable routing matches factory | Yes | Partial |
This is the original front sensor for the DJI Mavic Pro. Match the RZ-04 marking and the two flex connector positions against the part you removed. After install, check that the DJI app reports front sensor status before you fly.
Look for the RZ-04 part marking, the machined aluminum bracket, and the two flex connectors laid out like the factory assembly. Unbranded modules often miss one of these details. Compare the part against your removed sensor before installing.
The job is a bench repair. You need to power down, lift the locking tabs, seat two flex cables, and reconnect. Calibrate only if the app prompts you. Anyone uncomfortable with flex cables should hand the job to a repair tech.
This listing is the front sensor assembly with its twin lenses, bracket and flex connectors. Check the photos against your removed part to confirm you are getting the same component.
A front sensor replacement costs a fraction of a full airframe. You keep the drone you already fly, with its battery, camera and settings intact, and you get forward obstacle detection back.


 DJI Mavic Pro Front Vision Sensor for Obstacle Avoidance