
$39.90
Free delivery · 7–14 days
Halloween Ghost Candle Molds for Easy DIY Decorations
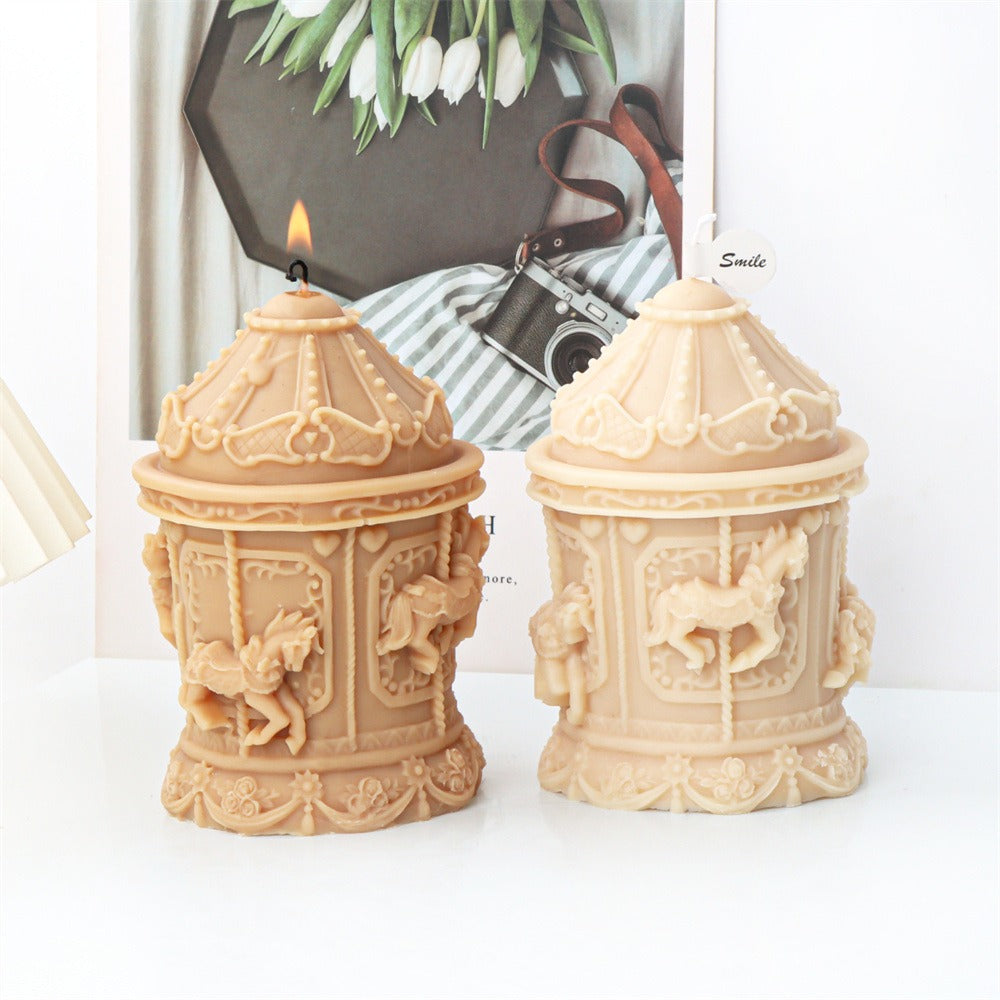


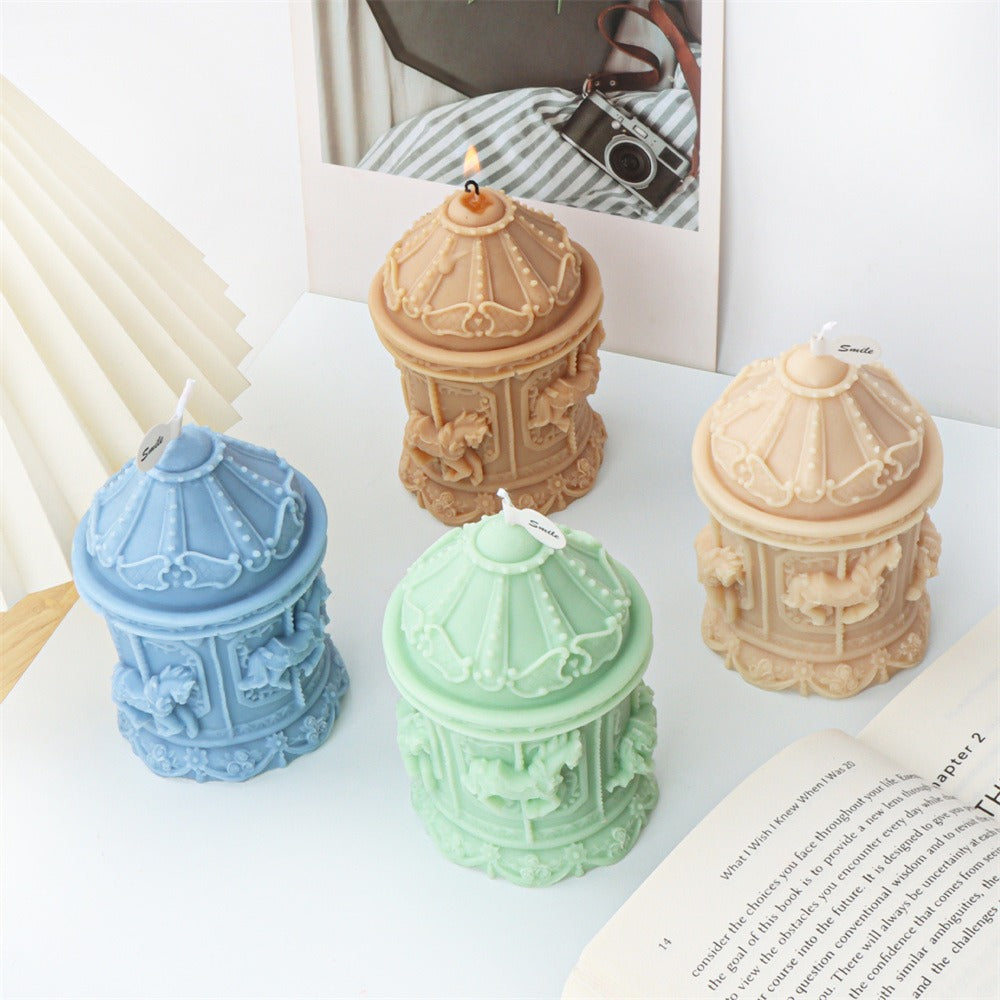

Turn one weekend pour into a sculpted carousel candle with raised horses, canopy ornamentation, and vintage scrollwork. Make a colorful seasonal centerpiece, handmade gift, or craft-fair favorite.
Read the full descriptionTurn one weekend pour into a sculpted carousel candle with raised horses, canopy ornamentation, and vintage scrollwork. Make a colorful seasonal centerpiece, handmade gift, or craft-fair favorite.
Make a richly detailed retro carousel candle at home
Skip flat, forgettable candles and pour a sculpted centerpiece with raised carousel horses, canopy details, and vintage-inspired ornamentation.

Carousel horses, canopy ornaments, borders, scrollwork, and base detailing transfer directly into the candle surface. No hand-carving marathon required.

The cylindrical body and domed canopy create a recognizable decorative object rather than another anonymous pillar. It looks ready for a mantel, shelf, gift box, or craft-fair table.

The translucent flexible silicone is easier to handle around intricate relief than a rigid decorative mold. Flex the form gradually after the wax has fully set.
Use your chosen wax color, fragrance, and finishing approach to create seasonal decor, handmade gifts, aromatherapy candles, or a recognizable small-batch collection.
Place and secure your wick through the mold's wick opening, keeping it centered before adding wax.
Choose your wax, fragrance, and color. Check the cylindrical cavity, base pour area, and wick alignment before filling.
Pour carefully so the wax reaches the horse relief, canopy, scrollwork, borders, and decorative base areas.
Allow the candle to cool and set according to your wax supplier's instructions. Rushing this part is how good details get wobbly.
Release the edges first, then flex the silicone gradually around the candle. Lift gently and inspect the embossed finish.
Translucent flexible silicone mold with embossed carousel details.
Choose your preferred candle wax separately.
Select a wick suited to your chosen wax and finished candle.
Add separately when making a scented or aromatherapy candle.
You can pour another plain pillar, paint on a few details, and hope it feels special. Or you can start with a form that gives the candle personality before the wax even sets.
Hand-building tiny horses, scrollwork, borders, and canopy ornament is a heroic use of an afternoon. This flexible silicone mold puts those details into the pour, so the ambitious part is choosing your wax color.
The finished candle becomes the detail guests notice first on a seasonal display. Make it in soft pink, mint, powder blue, warm caramel, or ivory cream, then keep it for your shelf or give it to someone who appreciates handmade magic.
Remove wax residue without aggressively scraping the embossed cavity.
Let the mold dry fully before putting it away.
Flex the silicone around the edges instead of pulling hard against the relief.
Keep the mold protected from crushing or sharp objects that could mark the cavity.
| Carousel mold | Plain cylinder | Hand-carved wax | |
|---|---|---|---|
| Raised carousel horses | Yes | No | Possible |
| Domed canopy silhouette | Yes | No | Possible |
| Scrollwork formed during pouring | Yes | No | No |
| Distinctive gift or display shape | Yes | Partial | Possible |
| Decorative work after the pour | Minimal | Optional | Extensive |
Yes, the flexible silicone makes release approachable, but the fine relief deserves patience. Let the wax set fully, release the edges first, and flex the mold gradually rather than pulling the candle out by force.
No. The package includes the carousel candle mold itself. Wax, wick, fragrance oil, and any coloring are supplied separately so you can choose the materials and scent that suit your project.
Yes. Pair the mold with your chosen scented wax or fragrance oil, following the usage guidance for those materials. The finished form works as both a decorative candle and a seasonal aromatherapy accent.
It is the stronger choice when visual impact matters. A plain cylinder gives you a basic shape, while this mold creates horses, canopy ornamentation, scrollwork, and base detailing during the pour. That means the candle feels gift-worthy without hours of hand-carving.
Clean away residue gently, avoid aggressive scraping inside the embossed cavity, and let the silicone dry completely before storage. Keep it protected from sharp objects and heavy crushing.
Yes. The process is familiar to anyone who can set a wick, prepare wax, pour carefully, wait for a full set, and unmold slowly. The mold supplies the decorative ambition, so beginners can focus on a clean pour.


 Retro Carousel Candle Mold for Detailed Holiday Decor