
$49.90
Free delivery · 7–14 days
Silicone Face Exerciser for Daily Lip Toning RoutineGuided finger training you can run from a sofa or kitchen table. Five motorized finger segments, adjustable straps and a simple LED controller let you set the speed and force, and build a steady daily practice between clinic visits.
Read the full descriptionGuided finger training you can run from a sofa or kitchen table. Five motorized finger segments, adjustable straps and a simple LED controller let you set the speed and force, and build a steady daily practice between clinic visits.
Portable robotic glove that trains hand function and finger flexibility for stroke and hemiplegia recovery
Stiff, weak fingers after stroke make simple tasks hard. Use a portable robotic glove for guided finger training at home, seated, one session at a time.
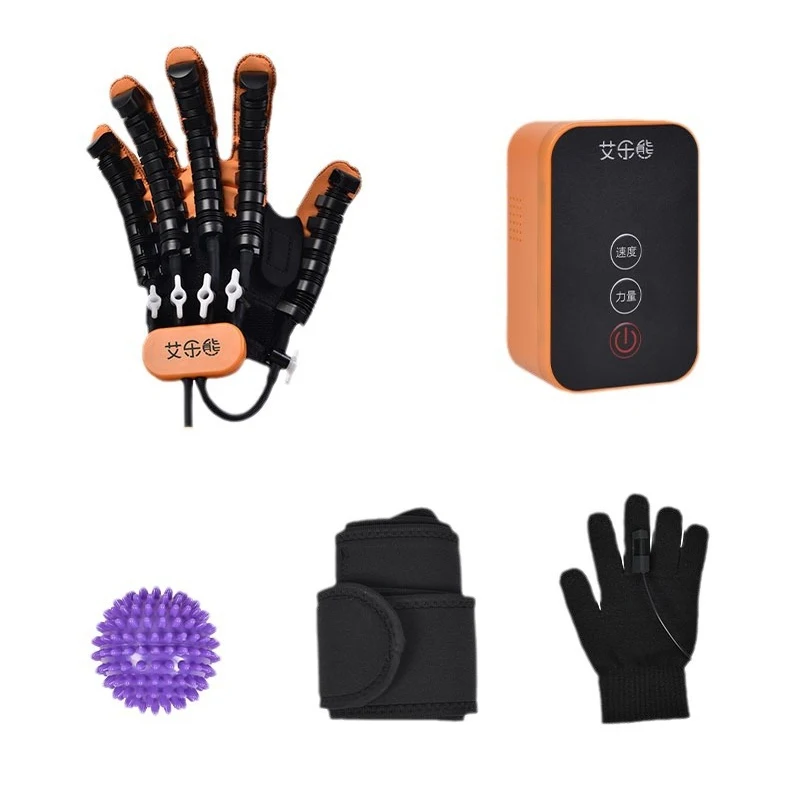
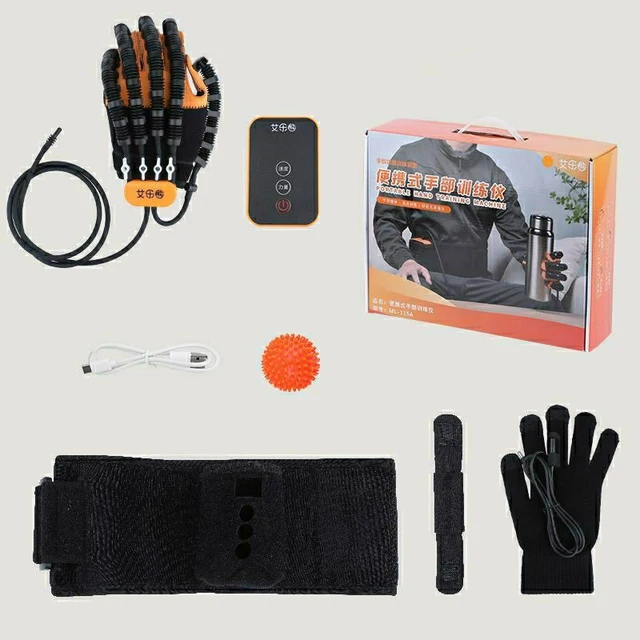
Five independent motorized segments run along the fingers, so each finger flexes and extends on its own path. The glove fits the hand with straps at the wrist, palm and fingers, and the segments follow the movement you set.
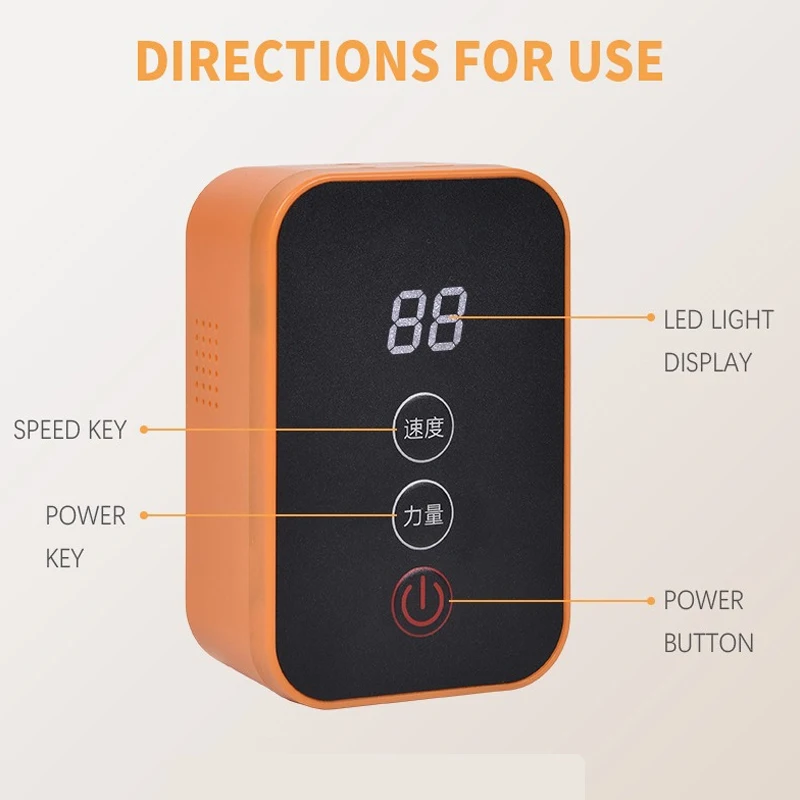
The handheld controller has speed and force buttons and a clear LED display. Start low, watch the readout, and adjust with a thumb press. Caregivers can set the level too, so you can focus on the movement.
The battery pack clips to a waist belt, and the wrist strap lets the glove move from the sofa to the kitchen table. The setup stays light enough to use in short daily sessions.
Sit with your forearm resting on a sofa arm or table. Fasten the wrist strap snugly so the glove stays in place.
Close the palm strap and the finger straps. Each strap should hold firmly without pinching or cutting off circulation.
Turn on the controller, check the LED display, and select the lowest speed and force for your first session.
Start the movement and watch how the fingers respond. Stop if you feel pain, tingling or fatigue, and loosen the straps if the skin looks red.
Silicone, matte black with orange accents, five motorized finger segments
Handheld, glossy orange, LED display with speed and force buttons
Battery pack on an adjustable waist belt
Textured ball for tactile input between sessions
After a stroke, fingers that will not open or hold a cup turn ordinary hours into a wait for help. Stiffness settles in quickly when the hand goes unused, and grip weakens with it. Most people feel the gap most at breakfast and at the end of the day.
The glove moves each finger through guided flexion and extension while you sit. Set the speed and force on the controller, then run a short session between clinic visits. Keep a simple finger exerciser routine on the table so the practice never gets pushed to tomorrow.
Begin at the lowest speed and force and let your hand tell you how the session feels. Raise the level only when your clinician agrees and your fingers feel fine the next morning. Steady sessions build the habit, and the habit is what carries the progress.
Fit the straps comfortably and start on the lowest speed and force. Notice how the fingers move and how your hand feels afterward.
Complete brief seated sessions most days. The routine is easier to keep when it fits a fixed time, such as after breakfast.
Note changes in finger movement, ease of opening your hand and comfort. Share your log with your therapist so you can adjust the program together.
Results vary widely between people. Review your progress with your clinician and decide together whether to continue, change settings or adjust the plan.
| This glove | Clinic robot therapy | Printed hand exercises | |
|---|---|---|---|
| Used at home | — | ||
| Guided finger movement | — | ||
| Available between clinic visits | — | ||
| Adjustable speed and force | Partial | — | |
| Needs a clinic visit to train | — | — |
Yes. Check with your clinician before your first session, then ask them to set the starting speed and force with you. The glove is built for practice inside a plan your clinician agrees to.
The glove comes in sizes S, M, L, XL and XXL. Pick the size that matches your hand, then tighten the wrist, palm and finger straps to a snug fit. Start with the affected hand and check the skin after each session.
Sessions are seated, so the cord rarely gets in the way. Plan sessions at a sofa or table where the cord runs easily, and keep the belt pack clipped on while you train.
Yes. The controller has simple speed, force and power buttons and a clear LED display, so a caregiver can set the level and start the session while the user stays seated.
Start at the lowest speed and force, run a short session, and check how the hand feels the next day. Raise the level only when your clinician agrees and the fingers feel comfortable.
Clinic sessions are scheduled and cost a visit each time. This glove runs on your own schedule, so the cost per session drops the more often you train. Daily sessions at home give you more practice time than a weekly clinic slot.

