
$35.90
Free delivery · 7–14 days
Nail Art Crystal Stones Set — 12 Shades for 3D Glam Designs


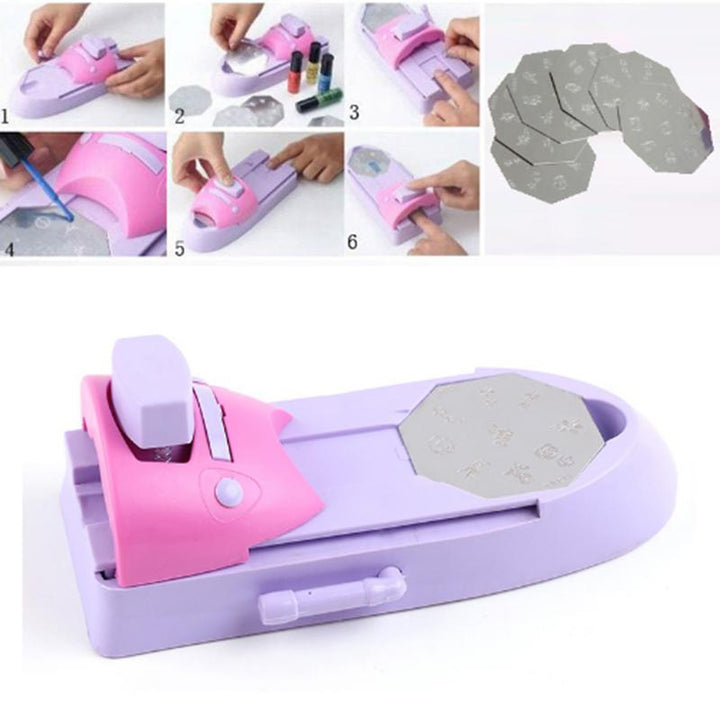

Nail dotting tools make it easier to create polka dots, flowers, marbling details, and other nail art at home. This collection includes precision dotting pens, smudge tools, brushes, rhinestone pickers, crystal accents, and a nail art printer for designs ranging from simple to salon-inspired.
Start with the type of nail art you want to create. For classic polka dots, flowers, and simple character details, choose a dual-ended dotting tool with different tip sizes. A dotting pen with a rhinestone picker is useful when you want to switch between painting dots and placing small decorations. If you enjoy gradients, swirls, or soft marbling, add a double-headed smudge stick. Nail art brushes provide more control for fine lines and small painted details, while crystal stones add raised accents. For quick, printed salon-style designs, a nail art printer offers a different approach from hand-painted nail dotting tools.
Dotting pens use rounded metal or precision tips to transfer polish in controlled circles. Double-ended designs give you more than one working size without requiring separate tools. Smudge sticks are suited to blending, dragging, and softening polish, but they can also create dots when used with the right amount of product. Nail art brush sets are better for lines, outlines, petals, and detailed artwork rather than evenly sized dots. Rhinestone picker tools help position crystal stones after the polish or adhesive layer is ready. A nail art printer is best for fast, detailed patterns when you prefer printed decoration over freehand work.
Look for a comfortable grip that stays steady while you work with wet polish. Multiple tip sizes are useful because small dots suit fine accents, while larger tips create bold petals and polka dots. Smooth, rounded tips help transfer polish without catching on the nail surface. If you plan to use rhinestones, a dual-ended nail dotting pen and picker can reduce the number of tools on your table. For broader nail art projects, consider a set that combines dotting tools with brushes. Also check whether the tool is easy to wipe clean between colors, since dried polish can change the shape and consistency of later dots.
Apply your base color and let it dry enough that the surface is not easily disturbed. Place a small amount of contrasting polish on a palette, foil, or other disposable surface rather than dipping directly into the bottle. Touch the rounded tip into the polish, then press it straight down onto the nail and lift straight up. Reload the tip as needed, keeping the amount of polish consistent for more even dots. Use a smaller tip for narrow spacing or delicate patterns and a larger tip for bold circles. Allow the design to set before applying top coat, using a light pass to avoid dragging the dots.
Common household substitutes include the rounded end of a bobby pin, a sewing pin held carefully in a pencil eraser, a toothpick for very small dots, or the blunt end of a clean makeup tool. These alternatives can work for occasional nail art, but their shapes may produce less consistent circles than a purpose-made nail dotting tool. A toothpick creates tiny marks and may not hold enough polish for larger dots. Avoid sharp points near the skin and keep any substitute clean before use. If you want repeatable nail dotting tool designs, a dual-ended dotting pen is easier to control and offers more size options.
Using too much polish is one of the most common causes of raised, smeared, or uneven dots. Wipe excess product onto your palette before touching the nail, and reload the tip when the marks become faint. Pressing at an angle can create teardrop shapes instead of circles, so try a straight down-and-up motion. Starting before the base coat is ready can pull up the background color. Another mistake is placing dots too close together without allowing room for the pattern to read clearly. Clean the tool between colors and after each session, following the material’s care instructions, so dried polish does not affect future designs.
Nail dotting tools suit beginners who want an approachable way to add detail without mastering fine brushwork first. They are also useful for experienced nail artists creating flowers, leopard spots, cartoon details, borders, and geometric patterns. A dual-ended pen works well for compact home setups, while a brush set and crystal stones kit offer more options for layered designs and 3D-style decoration. Choose a smudge stick if blending and marbling interest you. If you want detailed designs with minimal freehand painting, consider the nail art printer. Shoppers looking for a nail dotting tool near me can compare tip sizes, included accessories, and cleanup requirements online before choosing a kit.
You can try a bobby pin’s rounded end, a toothpick for tiny marks, or a sewing pin secured in a pencil eraser. These substitutes may not create dots as evenly as a purpose-made tool, so use a dual-ended dotting pen when consistent sizes matter.
The best option depends on your designs. A dual-ended nail dotting pen is a versatile choice for beginners and polka dots, while a set with brushes suits more detailed artwork. If you also use embellishments, choose a dotting pen with a rhinestone picker.
Use a rounded nail dotting tool, nail dotting pen, or the rounded end of a bobby pin. Dip the tip into a small amount of polish, press it straight onto the nail, and lift it straight up to form a circle.
A nail dotting pen is the most practical option because it is designed to transfer small amounts of polish in controlled circles. You can also use a toothpick for tiny dots or a rounded household item for occasional designs.
Make a simple substitute by placing a sewing pin into a pencil eraser, using the rounded head as the dotting end. You can also use a bobby pin or toothpick, depending on the dot size you want. Handle sharp items carefully and keep the tool clean.
Let the base color become set, then place a small amount of polish on a palette. Dip the rounded tip lightly, press straight down, and lift straight up without twisting. Reload the tip as needed and leave enough space between dots so the pattern stays clear before applying top coat.