Portable Gravity Sandblasting Gun for On-Site Rust Removal
A handheld gravity sandblasting gun that runs off the compressor you already own. The red top hopper feeds media straight into the air stream, and the adjustable valve gives you control over light panels and heavy scale alike. Rust and paint come off where the part sits.
Read the full descriptionDescription
A handheld gravity sandblasting gun that runs off the compressor you already own. The red top hopper feeds media straight into the air stream, and the adjustable valve gives you control over light panels and heavy scale alike. Rust and paint come off where the part sits.
Portable gravity sandblasting gun for on-the-spot rust, paint and surface removal, no bulky blasting cabinet needed
- Parts too large or fixed to move to a blasting cabinet
- Rust and paint removal on-site
- Precise control over blast area via adjustable media flow
- Lightweight tool for overhead or extended use
Strip rust and paint where the part sits
Skip hauling heavy parts to a blasting cabinet. Connect your air compressor, set the media flow, and take bare metal back in the garage.
Built around the parts you actually control
- Control the blast with a valve
The adjustable media flow valve lets you dial in how much abrasive reaches the nozzle. Use a light setting on a thin panel, then open it up for heavy scale on a frame rail. The hopper sits on top, so the media feeds by gravity and the flow stays steady while you work.
- Built to be held, not fought
The matte black pistol grip has ribbed texture so it does not slip with gloves on. The silver trigger sits where your finger expects it. Long sessions on overhead brackets or underside panels are less tiring than a bulky cabinet gun.
- Clean air, clean finish
The inline filter and water trap sit between your compressor and the gun. They catch moisture and oil before it reaches the media. Dry air keeps the media flowing and gives an even finish rather than spotty patches. Drain the trap before each session and the results stay consistent.
From compressor to first clean pass
- 1Connect the filter and coupler
Thread the quick-connect coupler onto your compressor line, then fit the inline filter and water trap between the compressor and the hose.
- 2Attach the hose and gun
Connect the coiled air hose to the filter outlet, then to the gun. Unroll enough hose to reach the work without pulling the gun tight.
- 3Fill the hopper and set the valve
Unscrew the black cap, add your blasting media, and close the cap. Open the flow valve slowly until the media feeds steadily.
- 4Test on scrap first
Blast a scrap piece of similar metal in short passes. Adjust the valve until the spray pattern suits the surface.
- 5Work in short passes and clean up
Keep the nozzle moving at a steady distance. When you finish, drain the water trap and clear the nozzle with the cleaning needles.
Everything in the kit to start blasting today
- Sandblasting gun×1
Red top hopper, adjustable media valve, black grip
- Quick-connect air coupler×1
Threads onto the compressor line
- Coiled air hose×1
With connectors at both ends
- Inline air filter and water separator×1
Keeps moisture and oil out of the blast
- Cleaning needles and brushes×1
For clearing the nozzle after each session
The part that will not leave the garage
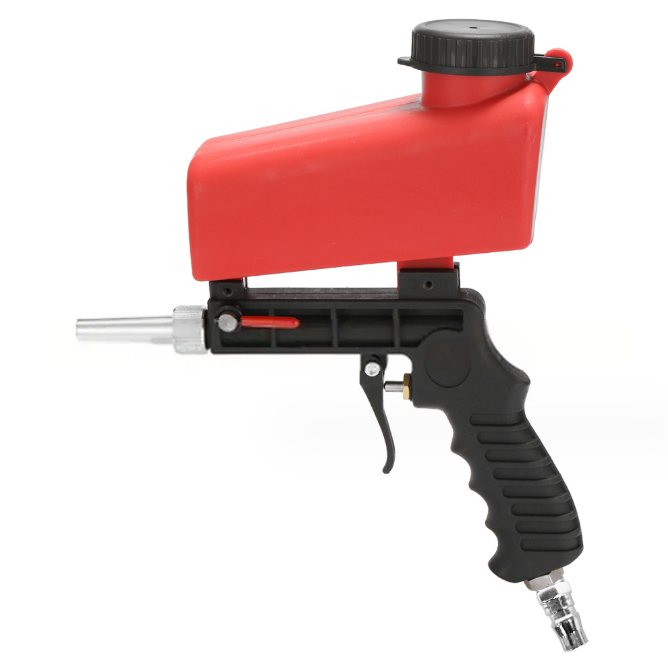
The part that will not move
A frame rail or a fixed bracket sits where it always has. Wire brushing it gives you an afternoon of scraping and a surface that still pits under the paint. A blasting cabinet would solve it, but the part does not fit through the door.
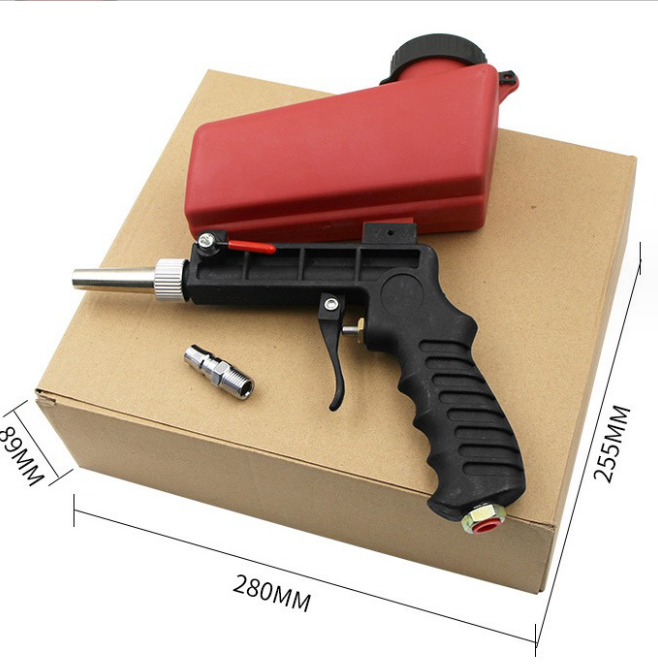
Control at the nozzle
The gun drops the media straight into the air stream from the top hopper, so there is no pressure pot to fill and no hose to drag across the floor. The flow valve sets how much media reaches the surface. Thin panels get a light touch and heavy scale gets a firmer pass.
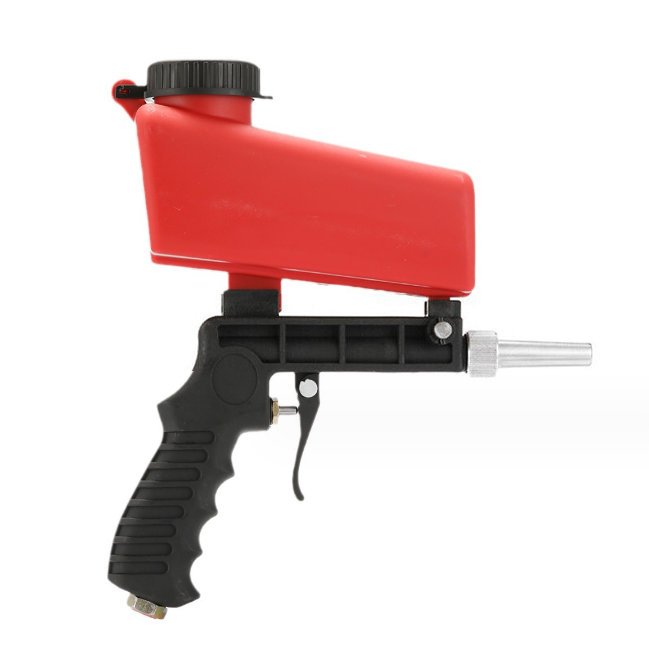
Bare metal by Sunday
The rust comes off in one session and the metal stays where it was. Clean, bare steel takes primer well, so the next step is a coat of paint or a repair. Once the job is done, the coiled hose winds back up and the gun goes on the shelf until the next project.
Keep the gun working between jobs
- Drain the water trap
Empty the inline filter before every session so moisture never reaches the media.
- Clear the nozzle
Run the cleaning needles through the chrome nozzle after each job.
- Coil the hose
Store the air hose coiled and out of the way to avoid kinks.
Portable blasting versus the cabinet and the wire wheel
| This gun | Blasting cabinet | Wire wheel | |
|---|---|---|---|
| Works on parts that stay where they are | — | ||
| Needs the part moved into a cabinet | — | — | |
| Adjustable media flow | Partial | — | |
| Kit includes filter, hose and coupler | — | — | |
| Even surface from media blasting | — |
Characteristics
Reviews
Questions and answers
The gun is rated at 90psi. Check that your compressor can hold that pressure and deliver enough airflow at the gun. Pressure alone does not finish the job. A tank that cannot keep up will stall partway through a panel. If your compressor runs a standard spray tool, it will run this gun.
The gun body is all-aluminum and lightweight, which keeps it easy to hold for overhead or extended work. The red hopper and black grip are molded plastic, and the nozzle is chrome-plated metal. The aluminum body carries the weight, and the plastic parts sit where wear is light.
Use a blasting media that suits the surface and the finish you want. Yes, you need a respirator and sealed eye protection. Blast dust from rust and old paint should not be breathed in. Work in a ventilated space, drain the water trap before each session, and run a test pass on scrap first.
Yes, as long as you start with low flow. The valve gives you the control to take light passes on thin panels. Test on scrap that matches the panel thickness, then move in short passes and keep the nozzle moving. Aggressive blasting on light sheet metal can thin or warp it.
You get the blasting gun, a quick-connect air coupler, a coiled air hose with connectors, an inline air filter and water separator, and cleaning needles for the nozzle. Everything you need to connect to a compressor is in the box.
A shop charges every time you need a job done, and you have to move the part there. This kit is a one-time purchase that runs off a compressor you already own. For a restoration with several parts, the kit pays for itself on the first project that would otherwise go to a shop.