
$83.90
Free delivery · 7–14 days
Leather Cleaning Wipes for Car Seats, Waterless CareEdges that stay fuzzy after every cut are the fastest way to make a finished piece look homemade. This two-piece kit runs on the rotary tool you already own, and its tapered diamond-grit heads leave leather and wood edges smooth, glossy and sealed in minutes.
Read the full descriptionEdges that stay fuzzy after every cut are the fastest way to make a finished piece look homemade. This two-piece kit runs on the rotary tool you already own, and its tapered diamond-grit heads leave leather and wood edges smooth, glossy and sealed in minutes.
Professional-grade tapered burnishers that give leather edges a smooth, sealed, polished finish when used with a rotary tool
Fibrous, uneven edges slow every wallet, belt and bag you finish. With a rotary tool and tapered burnisher heads, the edge comes off the bench smooth, glossy and sealed.
The conical tip narrows into tight radii where flat slickers and sandpaper stop short. Run it around a wallet corner or down the rounded end of a belt and the edge stays even through the turn.
The textured working surface burnishes the edge instead of only abrading it. The result is a tight, sealed sheen rather than a dull, scuffed band.
The brass wire cup pulls loose fibers and dust out of the edge, so the burnisher works on a clean surface. Brush first, burnish second, and the finish looks even all the way along.
Seat the round shank in your rotary tool or drill chuck and tighten it firmly.
Run the brass brush cup along the edge to lift loose fibers and dust.
Switch to the tapered head and work along the edge at low to moderate speed. Keep the head moving until the surface sheens.
Try speed and pressure on a scrap from the same leather before you touch the finished piece.
Diamond-grit working surface for leather and wood edges
Clears loose fibers and dust before burnishing
Fits a rotary tool or drill chuck
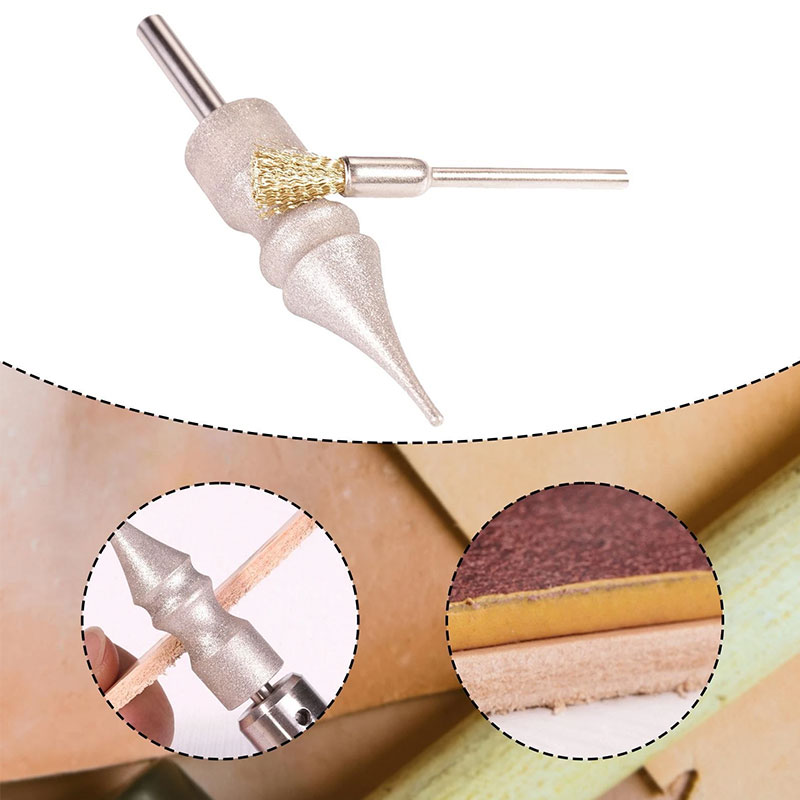
You cut clean, stitch straight and then the edge lets the whole piece down. Sandpaper leaves fibers standing, and slickers struggle on curves. Hours go in, and the edge still looks fuzzy next to a store-bought piece.
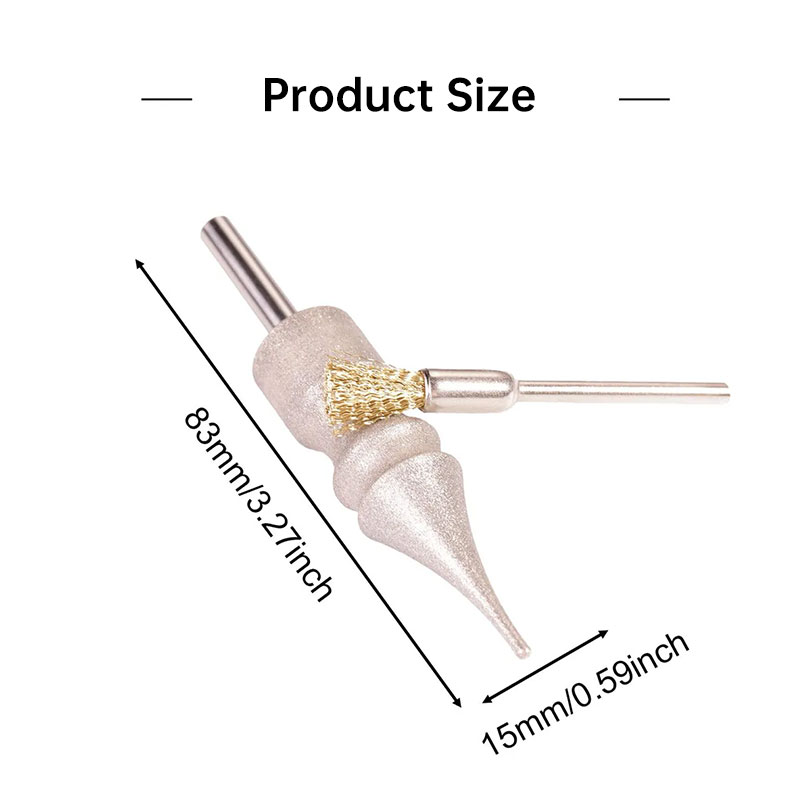
A tapered diamond-grit head on a round shank slides into the rotary tool you already run. The brass brush cup clears loose fibers first, then the tapered tip works along the edge at low to moderate speed until it sheens.
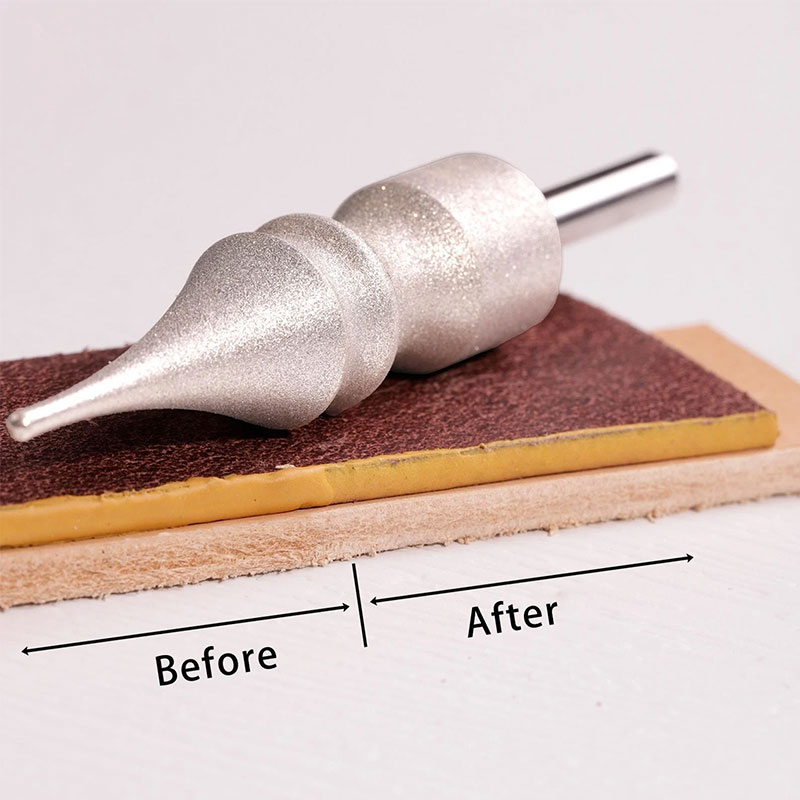
Two heads and one shank make a small, low-risk addition to the bench. Each wallet, belt or bag leaves the table with an edge that matches the work around it, and the next project starts with the same finish.
Test on scrap leather first. Start slow, keep the head moving, and watch how the edge responds before you work a finished piece.
After a few practice edges, the gloss gets smoother and more even. Results depend on leather type, edge prep and rotary speed.
With regular use, edge finishing becomes a steady step in your workflow, and consistency improves as you learn how your leather responds.
Pull out leather dust and loose fibers from the brass wire after each session.
Remove residue from the textured tip so it keeps gripping the edge.
Keep the heads dry so the metal stays clean on the bench.
| This kit | Hand sanding and slickers | Dedicated edge machine | |
|---|---|---|---|
| Runs on a rotary tool or drill you own | — | — | |
| Tapered tip for tight curves and corners | — | Partial | |
| Brass brush cleans the edge first | — | — | |
| Diamond-grit burnishing surface | — | Partial | |
| Cost for a home bench | Low | Low | High |
The shank is round and built as a 3mm-style fitting for a rotary tool or drill chuck. Check that your chuck takes a round shank of that size, since the shank is what has to seat. It seats snugly once tightened.
Yes. The tapered head shapes and smooths a wood strip edge at low speed with light pressure, moving along the grain. The same bench routine carries over to leather.
Sandpaper leaves fibers standing and slickers struggle on curves. The tapered tip follows tight radii, and the brass brush clears the edge before you burnish it. You get the sheen in minutes rather than hours of hand work.
No special leather is required. Burnish after stitching and edge sanding, and before dye or sealant. Test on an offcut from the same leather first, because density and tannage change how the edge responds.
You get two heads and one shank, and they run on a rotary tool you likely own already. Compared with a dedicated edge machine, the outlay is small. Compared with hours of hand sanding on every project, the time it returns adds up fast on a bench that gets used every week.


