Garden Hose Timer: Automatic Watering on a Schedule
Your garden gets watered on the schedule you set, and your evenings get back. The timer mounts on your backyard tap, runs on 2 x AAA batteries, and offers frequency from 1 to 72 hours with run times from 1 to 120 minutes. Lawns, beds and drip lines get the same program every cycle, including...
Read the full descriptionDescription
Your garden gets watered on the schedule you set, and your evenings get back. The timer mounts on your backyard tap, runs on 2 x AAA batteries, and offers frequency from 1 to 72 hours with run times from 1 to 120 minutes. Lawns, beds and drip lines get the same program every cycle, including the weeks you're away.
Automatic, programmable watering that runs on its own
- forgetting to water the garden
- manual watering time and effort
- over- or under-watering plants
- watering while away from home
Your garden waters itself, on schedule
Stop dragging a hose out every evening. Set the timer once on your backyard tap and your lawn and beds get watered, even when you're away.
Two dials, one simple schedule
- Set it and walk away
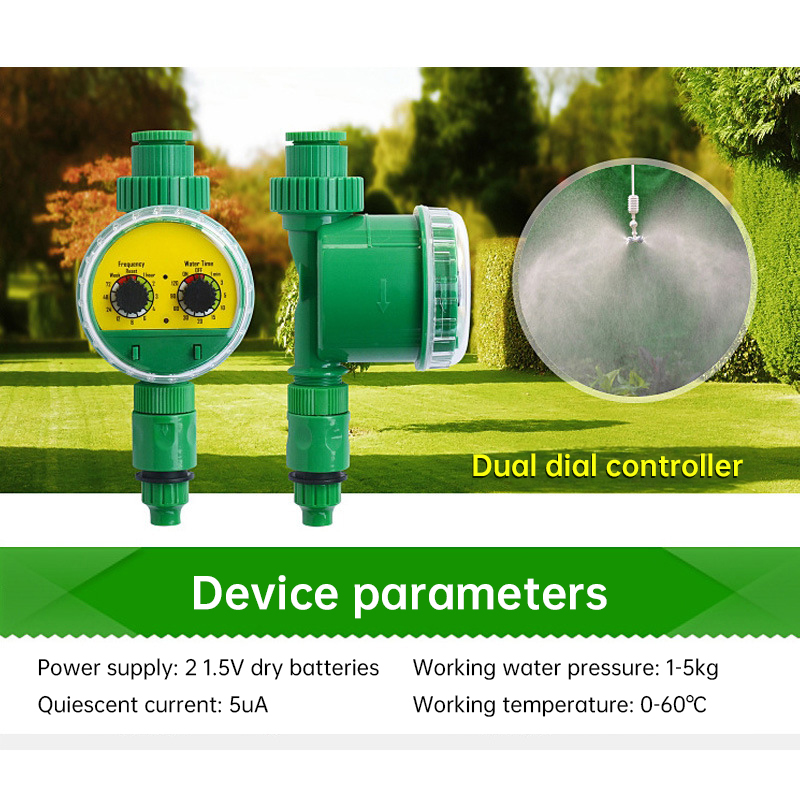
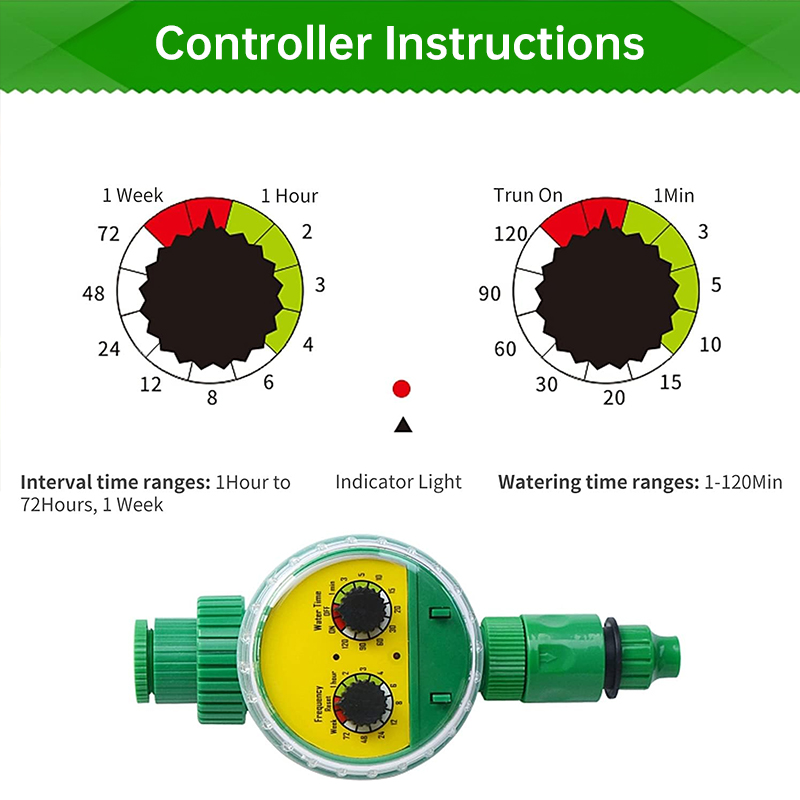
Pick a frequency from 1 to 72 hours, or weekly or reset, then set the run time from 1 to 120 minutes. The timer holds that program and starts each cycle on its own, so a missed evening stops being your problem.
- Clear dials, no guesswork
The dial cover is clear and the markings sit on a bright yellow face. ON and OFF positions are printed around the rim, so you can read frequency, run time and status from a few steps away.
- Fits the tap you already have
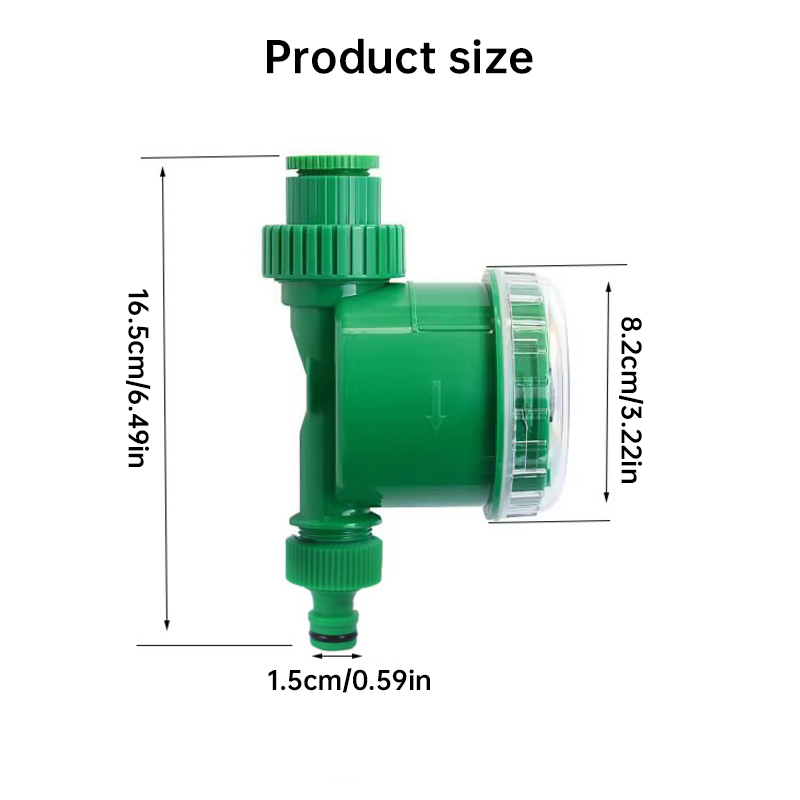
The sleeve connector, cap, quick-connect hose fitting and a tap adapter for non-threaded taps cover the common outdoor setups. Wrap PTFE tape on threaded taps before you tighten, and the hose clicks on without tools.
The settings that run it
- 2 x AAABattery pack, batteries not included
- 1-72 hWatering interval range
- 1-120 minAdjustable time per cycle
Installed on your tap in minutes
- 1Insert the batteries
Put 2 x AAA batteries into the compartment. Batteries are not included, so pick them up before you start.
- 2Attach the sleeve to the timer
Connect the sleeve connector to the timer. On a threaded tap, wrap PTFE tape first. On a non-threaded tap, use the included adapter instead.
- 3Tighten the cap
Thread the cap over the sleeve and turn it firmly by hand.
- 4Tighten the joint
Snug the joint between the timer and the tap so the connection holds water without leaks.
- 5Clip on the hose
Attach the quick connector to your garden hose. It clicks on with a firm, easy snap.
- 6Set the program
Turn the frequency dial to your interval and the watering-time dial to your run time. Check that the dial sits on ON.
Everything to connect it in one pack
- Electronic ball-valve timer controller×1
Two dials for frequency and run time, with clear dial cover
- Tap connector sleeve and cap×1
Attaches the timer to the outdoor tap
- Hose quick connector×1
Snaps onto your garden hose and detaches when the season ends
- Tap adapter×1
For non-threaded outdoor taps
From the evening hose to a timer on the tap
The evening hose routine
Every evening the hose comes out, the lawn gets a rushed soak, and the beds get whatever is left over. Skip a day and the grass turns dull. The chore eats time you wanted for yourself.
Set it once, then walk away
A two-dial timer on the tap takes the schedule off your mind. Set how often it runs and how long each cycle lasts, then leave the tap alone. Lawn and beds get the same program every cycle.
Green garden while you're gone
Holiday season used to mean a worried message to a neighbor. With the timer set, the garden keeps its schedule while you are away, and you come home to green grass.
What to expect over the first weeks
- Day 1Timer installed and programmed
Connect the sleeve, cap and hose fitting, insert 2 x AAA batteries, and set frequency and run time on the two dials.
- Week 1Schedule running on its own
Check that the first run starts and stops as set. If puddles form or soil stays dry, shorten or lengthen the run time.
- Day 30Routine on autopilot
The daily hose work is gone. Adjust the schedule to your climate and plant needs, and the garden keeps its own rhythm.
Why a tap timer, not the old routine
| This timer | Hand watering | Full drip kit | |
|---|---|---|---|
| Waters on a set schedule | Yes | No | Yes |
| No daily hose session | Yes | No | Yes |
| Installs on one tap in minutes | Yes | Yes | No |
| Runs while you are on holiday | Yes | No | Yes |
Characteristics
Reviews
Questions and answers
The sleeve connector and cap fit a threaded outdoor tap. If your tap has no thread, the included adapter takes its place. The hose side uses a quick connector that clicks onto a standard garden hose, so there is no separate fitting to buy.
Yes. The box includes a tap adapter for non-threaded taps. Fit the adapter, then connect the sleeve and cap as you would on a threaded tap.
It runs on 2 x AAA batteries, which are not included. Battery life is not printed on the packaging, so check the batteries before a long holiday and replace them when the timer stops starting its program.
The body is plastic and the dial sits under a clear cover, so the markings stay readable in full sun. Freezing weather is the one real risk. Drain the hose and take the timer off before the first hard frost.
Yes. Set the frequency and run time before you leave, confirm the dial sits on ON, and check the batteries. The garden follows the schedule while you're away.
A drip kit covers many separate zones, but it takes layout planning and parts. This timer is one unit on one tap that runs your hose on a schedule. For a lawn or a few beds, it costs less to set up and saves the layout work. Choose a drip kit only if you need several zones.