$54.90
Free delivery · 7–14 days
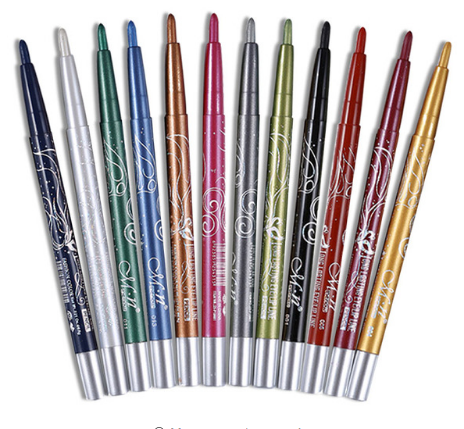
12-Color Eyeliner Pencil Set for Long-Lasting Looks


Create a brighter, more defined makeup look with one dual-ended pencil for targeted highlight and contour. Its creamy pointed tips keep daily sculpting precise, compact, and pleasantly uncomplicated.
Read the full descriptionCreate a brighter, more defined makeup look with one dual-ended pencil for targeted highlight and contour. Its creamy pointed tips keep daily sculpting precise, compact, and pleasantly uncomplicated.
One dual-ended pencil creates both luminous highlights and defined contour for a dimensional 3D makeup look
Turn flat-looking makeup into brighter, more defined features with one dual-ended pencil. Highlight, contour, and refine your look without juggling separate products.

One end provides highlighting and the other brings contour or bronzer color, so you do not have to coordinate separate face products for a simple sculpted look.

The pointed tips make placement easier around the nose, brow, under-eye, lips, and jawline. Draw small strokes, then soften them instead of wrestling with a broad applicator.

The creamy pencil texture gives you controlled color that can be softened with a fingertip or makeup tool. Use it for facial definition, eye and lip detail, or a touch of body highlight.
Use the highlighting end on the brow area, under-eyes, bridge of the nose, or other raised points you want to bring forward.
Use the contour or bronzer end beside the nose, beneath cheekbones, along the jawline, or around the lip line.
Blend each small stroke with a fingertip or makeup tool until the light and shadow look connected to the rest of your makeup.
Replace the clear protective caps after use so the pointed tips stay covered in your makeup bag.
Highlighting end paired with contour or bronzer end.
One cap for each pointed pencil end.
You apply your base carefully, then look again and still see a face without much light or structure. The makeup is there, but the finish feels unfinished.
Separate contour, bronzer, highlighter, and brushes make a quick look feel like a small logistics project. This double-ended makeup pencil keeps light and shadow together, so the routine gets shorter without losing control.
Use the pointed highlighting end where you want brightness and the contour end where you want soft structure. The creamy texture gives you a clear starting line that blends into a more natural finish.
Brighten under-eyes and brows, define the nose and jawline, or sharpen lip edges before heading out. It is the kind of compact tool that earns its place in a daily bag and a weekend touch-up pouch.
Use a suitable cosmetic pencil sharpener and take light passes to refresh the wood tip.
Replace the clear caps after every use.
Keep the pencil away from loose debris inside your makeup bag.
Build small strokes instead of drawing one heavy line across the face.
| Dual-Ended Pencil | Separate Products | |
|---|---|---|
| Highlighting end included | Yes | No |
| Contour or bronzer end included | Yes | No |
| Targeted pointed application | Yes | Partial |
| Compact travel format | Yes | Partial |
| Requires coordinating separate face products | No | Yes |
It can replace the need to carry separate products for basic highlighting and contouring. One end adds brightness and the other adds contour or bronzer color, so it is a strong value for everyday sculpting and touch-ups. It does not replace a full palette when you want many shades or finishes.
Use the highlighting end around the under-eyes, brows, bridge of the nose, and other raised areas. Use the contour end beside the nose, beneath cheekbones, along the jawline, around the lips, or on the collarbone. Keep each application targeted and blend the edges.
The cream texture gives you a controlled line that can be softened. Start with short, light strokes and blend before adding more. Heavy lines are more likely to look harsh than the pencil itself.
Champagne beige and soft rose beige suit brighter, softer highlighting. Warm tan gives a warmer bronzed direction, while deep taupe brown brings stronger contour definition. Test a small amount first and choose the shade that looks closest to the light or shadow you want to create.
The pencil is shown for eye and lip definition as well as facial sculpting. Use a light hand around those areas, keep the tip clean, and avoid placing makeup inside the eye or on irritated skin.
Use a cosmetic pencil sharpener and make light, controlled turns rather than forcing the wood. Sharpen only when the point needs refreshing, then replace the clear cap.


 Dual-Ended Contour & Highlighting Pencil for 3D Glow