
$64.90
Free delivery · 7–14 days
Cockroach Baits for Fast, Odorless Indoor Pest ControlA switched, fused ultrasonic unit for the engine bay of a car, RV or fleet van that sits for weeks. The kit has a rocker switch you can find by feel, a fuse on the positive lead and everything needed to wire it in one session.
Read the full descriptionA switched, fused ultrasonic unit for the engine bay of a car, RV or fleet van that sits for weeks. The kit has a rocker switch you can find by feel, a fuse on the positive lead and everything needed to wire it in one session.
Ultrasonic sensor-based repeller that keeps mice and rats away from your vehicle engine bay
Mice and rats can chew through a harness during a quiet week in storage. This compact ultrasonic unit adds a switched, fused deterrent layer to help keep them away.
The in-line fuse holder sits on the positive lead, so the circuit has a protected point between the battery and the unit. Fit it before you connect the leads to the battery. Route the red and black leads away from belts, fans and hot parts, then clip them down with the mounting loops.
The rocker switch sits on the side of the housing and the three indicator LEDs show when the unit is running. Turn it off for service or during a drive, and switch it back on before the car goes into storage. You do not need to unplug anything to pause it.
The unit, red and black leads, fuse holder and ring terminals come together. There is no separate shopping trip for connectors or a fuse. Lay the parts out, check them against the list, and the install starts from the same box.
Check the unit, red and black leads, in-line fuse holder and ring terminals against the kit before you start.
Install the in-line fuse holder on the red positive lead so the protected point sits between the battery and the unit.
Connect the leads to the battery terminals with the ring terminals. Make the connections firm before you route anything.
Keep the red and black leads away from belts, fans and hot components. Run them along the bay and avoid sharp bends.
Secure the unit with the mounting loops, turn the rocker switch on and confirm the three indicator LEDs light up.
Matte black sealed housing with emitter grille, LEDs and rocker switch
Positive and negative leads for battery connection
Mounts on the positive lead for circuit protection
For attaching the leads to the battery
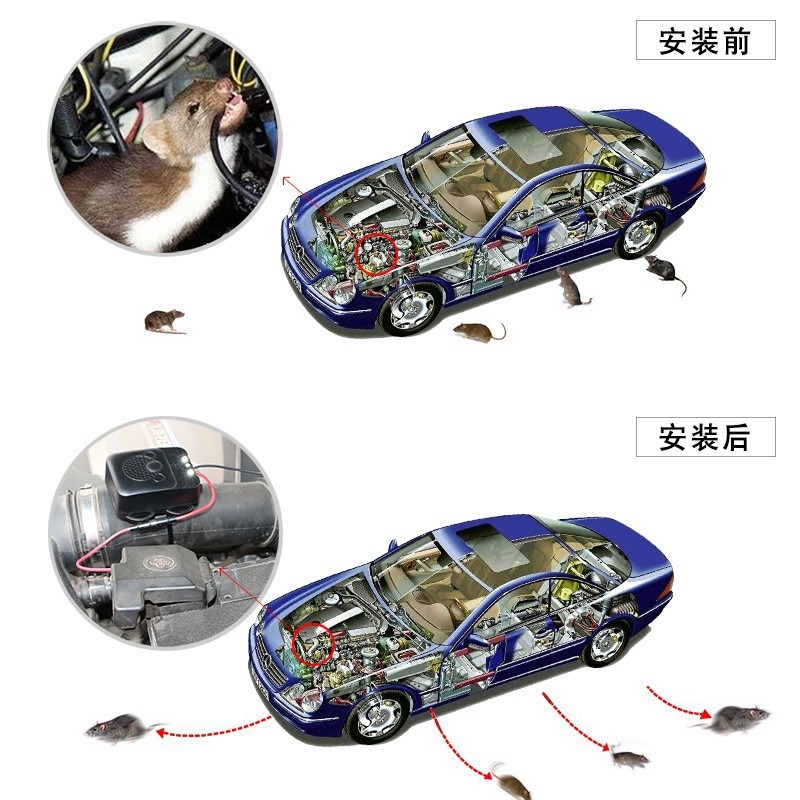
You open the hood after a month in storage and find shredded insulation along a harness. Maybe the engine turns over and then a warning light comes on. Either way the car needs a tow or a repair bill it did not need. Mothballs and peppermint oil were supposed to handle this, but the smell is gone within weeks and the rodents came back anyway.
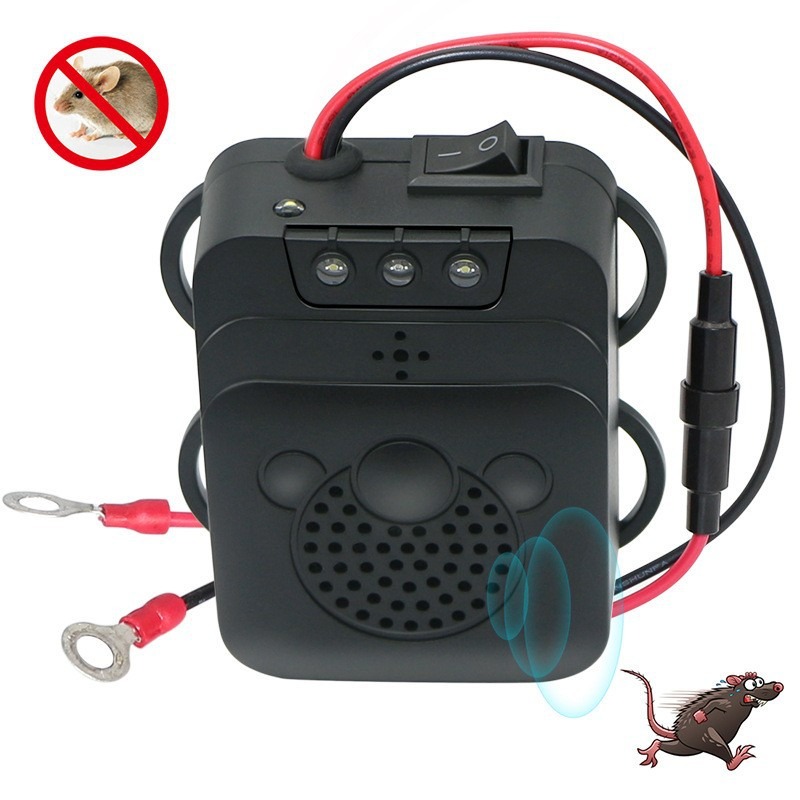
This unit runs on the battery through its own in-line fuse and a rocker switch you can see. The leads are clean and flexible, the housing is sealed, and the ring terminals bolt straight onto the battery. It takes one install, then it stays put for the storage period. Nothing is taped to the harness and nothing depends on a scent.
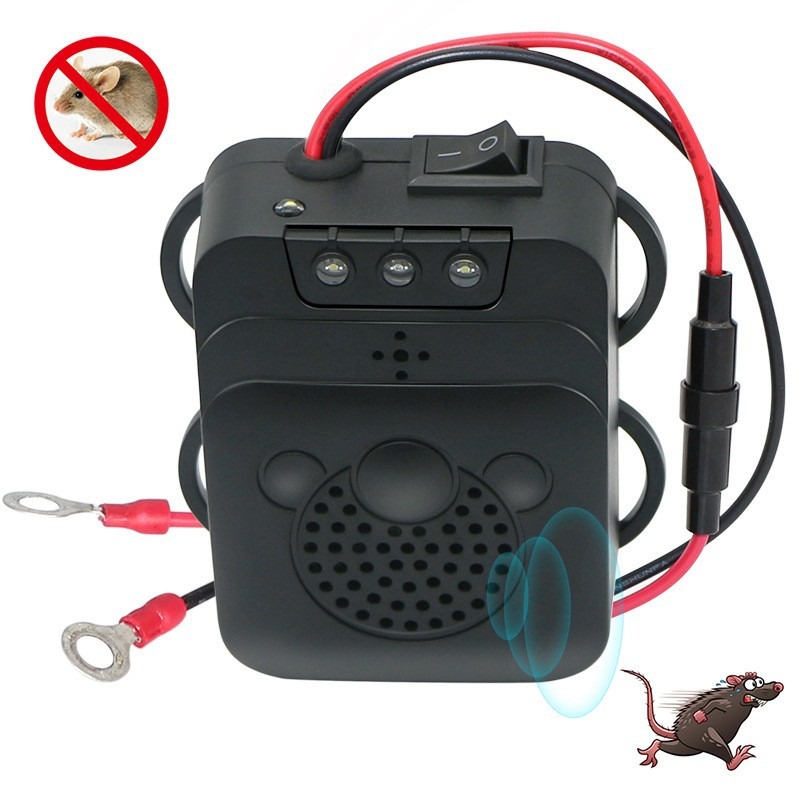
Three indicator LEDs confirm the unit is running before you lock the car. Switch it off when you drive, switch it on when the car goes into storage. The engine bay stays quieter, and you stop wondering what is chewing on the wiring while the car sits.
Wire the leads, fit the fuse and mount the unit. Check that the indicator LEDs light when the rocker switch is on.
Look under the hood for fresh droppings or new chewing. Results depend on the pest, the location and the vehicle.
Review the engine bay after a month of parking. Keep the unit switched on during storage and note any new signs of activity.
| This kit | Mothballs or peppermint oil | Snap traps | |
|---|---|---|---|
| Works without scent | — | ||
| Scent fades with weather | — | — | |
| Switch on and off | — | — | |
| Wired through a fuse | — | — | |
| Deters before damage | — |
It is a deterrent layer, not a guarantee. Ultrasonic sound is meant to make the engine bay less inviting, and it works best alongside sealed gaps and regular checks under the hood. Rodents can still come in through openings, so look for droppings or fresh chewing at each service.
It runs off the battery, so switch it off with the rocker when you do not need it. How much charge a stored car loses depends on the battery's age and condition, so check the battery before a multi-week storage period. A tired battery is the more common cause of a no-start than a repeller.
Fit the in-line fuse on the positive lead before you connect anything to the battery. Attach the ring terminals to the battery posts, route the leads away from belts and hot parts, and secure them with the mounting loops. The steps are in the install section below.
Yes, the same wiring applies to any vehicle with a 12 volt battery. Fleet managers usually fit one unit per vehicle and switch them on at shutdown. For an RV, mount the unit in the engine bay and keep the leads clear of moving parts.
Scents need refreshing as weather washes them out, and steel wool gets pulled apart. The unit has no scent to replace. You install it once, switch it on, and it stays in place for every storage period. A single harness repair usually costs more than the kit.

